From my experience, this process only works with an image
printed from an ink jet printer.
If you have a laser printer, try it anyway & let me know
if it worked for you.
Please use care when using the lacquer thinner. Gloves are recommended, and this should be done in a well ventilated area.
2. Print out in black ink on regular copy paper. Don’t let your printed image sit around for too long, the ink will dry and the transfer won’t be as effective once the ink has dried on the paper.
3. Lay this face down on your block and pin or tape it in place.
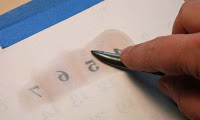
4. Dip a cotton ball in lacquer thinner, lightly saturate a small portion of the paper. Lacquer thinner evaporates quickly, so only work on a small section before moving on to the next.
5. Using firm pressure, rub the image with a standard metal burnisher in several directions.
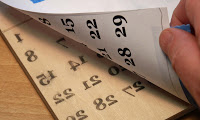
6. Periodically lift up a corner to check your progress. If necessary, more lacquer thinner can be added if your paper dries out too quickly.
Applying lacquer thinner with a cotton ball.


