Gelatin Plates & Exploring the Monotype
Gelli plates are made from gelatin (permanent plates are gelatin & glycerine) and are soft, flexible plates which can be used with hand-pressure or brayer pressure, opening the world of printmaking to those without presses or other heavy equipment. Instead of ink, you can use acrylic paints-as-ink, meaning cleanup is easy (water), even when the paint dries in your tools (unscented baby wipes take it right off).
The brands and styles of plates vary (you can make them at home, too!). I personally prefer the 3/8 inch Gelli Arts plate. 8×10 inches is an excellent starting size.
Gelatin plates are great for printing on paper, all types, and fabric (tight weave like cotton or muslin). You can use a number of paints-as-ink, including open body or liquid acrylics, or even textile screenprinting inks. (Oils will work, but are not recommended—they can break down your plate over time.)
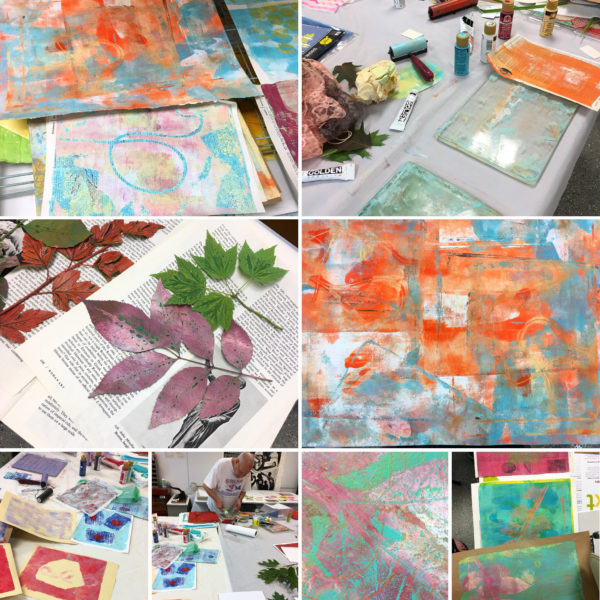
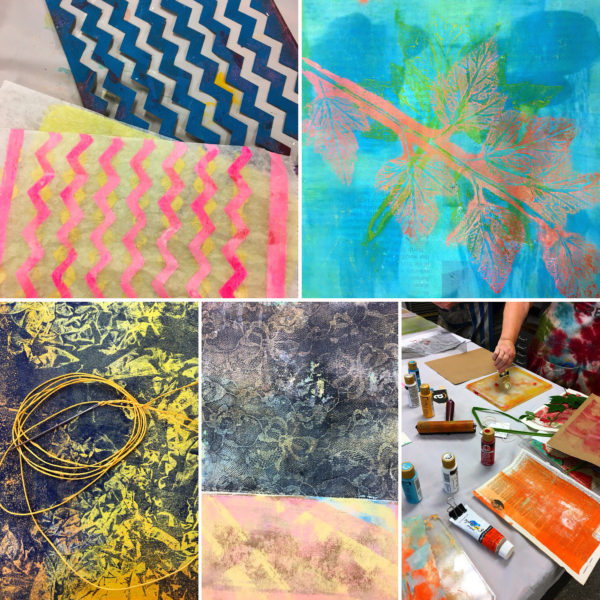
Since the matrix is slightly tacky to touch and it gives slightly with pressure, it tends to receive acrylic & hand-pressure well, allowing a printmaker to work with simple tools like paper & ink. It’s a quick, intuitive method of printing, well-suited to exploring color theory, materials, layering, and pattern. Masks, stencils, and mark-making tools are easily acquired or made from every-day items, meaning this is an accessible, low-cost gateway to the world of prints.
TIPS ON GETTING STARTED
Craft paints (like Folk Art) work well but dry fast. Your paint type will determine working speed.
Golden acrylics are my favorite to use, though I have had success mixing brands. (A paint with a heavy pigment load is better, as fillers tend to dry quite slowly—BASICS brand is one I don’t like to use, though it will work.)
Use less paint to start than you think you’ll need. Just a few pea-size dots of paint go a long way. Dotting ink directly onto the plate & spreading with a soft rubber brayer works well for thin layers, but you can also brush on.
If you pull a print you detest, save it and print over it. Some of the most spectacular results come from questionable first layers.
Try different papers—anything porous from tissue to deli paper to vintage book pages or heavy printmaking papers like Rives BFK.
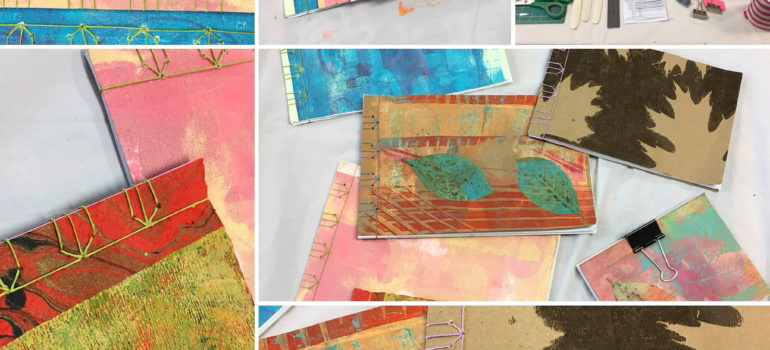
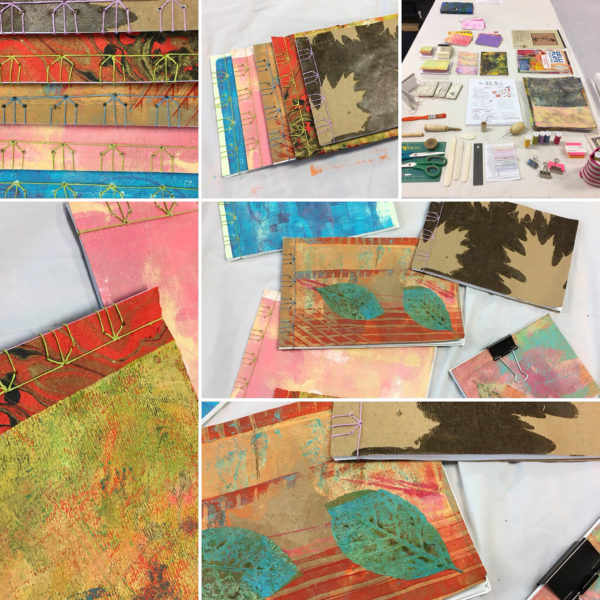
GELLI PRINTS INTO SIMPLE BOUND BOOKS
This class is taught by Nicci Mechler, a member of Tiger Lily Press. Further reading about the workshop & more of Nicci’s work can be found at: thicketheart.com. Nicci is a Cincinnati printmaker, bookbinder, writer, & editor. She runs Porkbelly Press, a feminist micro press specializing in handbound chapbooks & anthologies of poetry & prose.
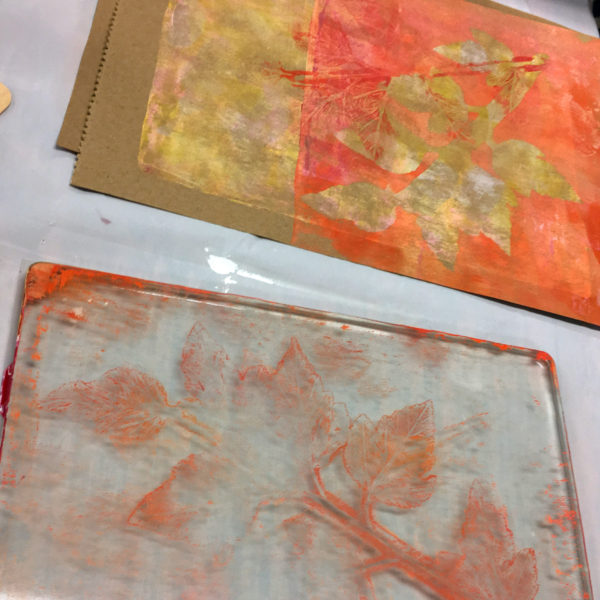
Five artists spent two days in the studio exploring the art of printing with acrylics & gelli plates, using various papers, masks, stencils, and tools for mark-making. Though our color palette was limited & shared, each artist found their way through the process intuitively, producing vastly different finished works.
On day two, we assembled to sew our prints into Japanese stab (or side-sewn) books, tortoise shell variation, using lightly-waxed linen thread. This binding can be daunting for a newcomer to the binding, simply because it requires 12 holes to be punched before sewing in a specific order. The book results are as visually engaging as the prints, ending in a wonderfully tactile, colorful set of handbound books.
INTERESTED IN A WORKSHOP?
If you’d like to take a workshop at Tiger Lily Press, you can check our class listings for seasonal offerings. If interest is great enough, we’ll occasionally add classes for 4-6 people, so if there’s something you’d love to take that we’re not currently offering, please contact us to share your interest.
MAKING YOUR OWN GELATIN PLATE
If you’d like to make a plate at home, you can try a gelatin plate to start, which can be made cheaply (around $2), or a permanent gelatin plate (about $8-$10 depending on how much a bottle of glycerine costs at your shop). Plain gelatin plates will mold after a few days, but are good for a quick session of testing. If you want something more durable, get a bottle of glycerine, some unflavored gelatin packets, and you can try making one yourself. There are about a hundred recipes and demo videos online, and if if you have an issue, you can microwave your plate bits in a safe container & try again. If your plate doesn’t set, try adding a bit more gelatin to the microwaved re-do.
Be sure you have a flat-bottom dish to pour it in. This recipe makes something about 5×7, or 6×6 inch round in my case. You can easily double the recipe until you run out of materials.
I picked up some unflavored store brand gelatin, ordered a bottle of vegetable glycerine, and tried 4 packets (1 oz total gelatin) in 6oz vegetable glycerine, but my plate didn’t set the first time. I scraped it back into a pyrex measuring cup the next day & microwaved it for 1 min, meanwhile mixing 2 more packets of unflavored gelatin in a little cold water to soften. I mixed both together, re-poured, and got quite a robust little plate after a couple hours of setting time. (You can probably get away with five .25 oz packets.)
Be sure your cooling surface is level if you mind your plate coming out a bit wonky.
To unmold your plate from its pan or dish, run a knife around the edge carefully to release it. If you’re still having trouble, try setting the mold into a bit of warm water to release the bottom (like a double boiler, but NOT boiling water—too much heat will reduce your plate to liquid again). If you tear your plate or gouge it by accident, you can rip it up, microwave for 1 min in your container, and pour again. No worries. It’s a pretty forgiving process.
If all of that sounds like too much for you, you can order Gelli Arts plates from places like Blick. They come with instructions for care & a resealable, airtight container.