How to Prepare a Copper Plate
(We’re using 4×6 copper plates at .05″ thick from Blick. This thickness requires the edges to be beveled before printing! They’re a pretty handy size to experiment with, and are, as of this writing, under $8 each.)
In order to protect the back of your plate, always keep it resting on a portable surface like a piece of paper or a paper towel. (Both sides of copper plates can be etched, so it’s best to keep them pristine as possible so you don’t have to buff out scratches later.)
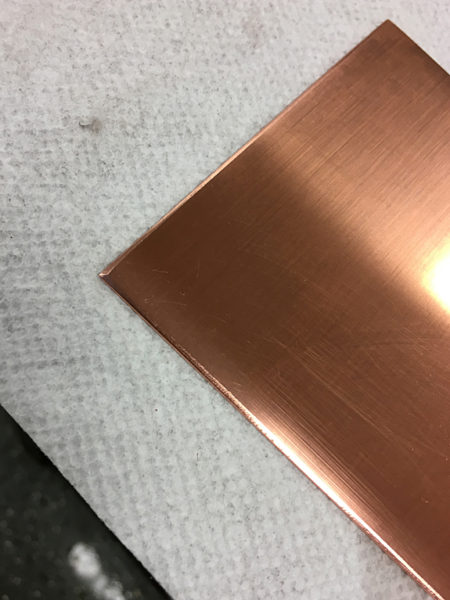
Lightly file the edges with even pressure and smooth strokes. The top edge of the above plate is burnished smooth as well as filed. You can see the slight texture left by our file in the left side edge. These can be burnished down with an oiled, smooth piece of hard metal (like the round shank of a screwdriver). Small burrs can also be removed with fine steel wool.
Once the edges and corners are smooth, use a degreaser to remove oils from the copper plate and turn on your hot plate to heat. We ground this plate with a hard ball ground, using heat between 250 and 300 degrees. It got a bit hot, so we had to finesse (our hot plate’s actual temperature isn’t the one displayed on the dial, so this becomes a by-feel rather than by-numbers endeavor.) We use a roller dedicated to ground, and wrap it in cling film to store it between uses.
If you find that your plate ground is uneven and too thick in places, or smears rather than rolls, your plate may be too hot. Remove from the hot plate (still on the piece of scrap paper for easier transport), and allow it to cool slightly before attempting to roll. You can re-heat if necessary and try again. (We instagrammed a tiny video of ground-rolling too.)
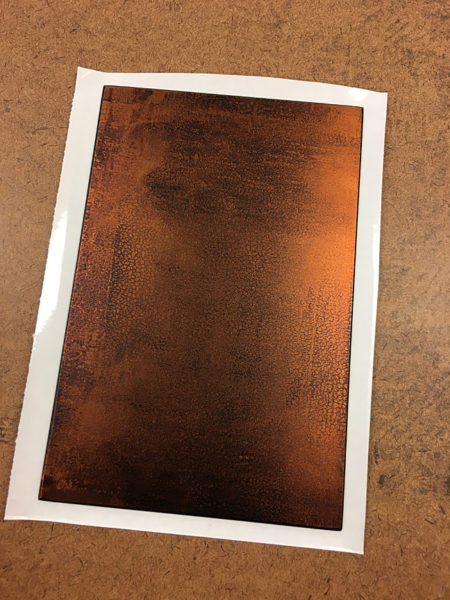
After grounding, you can apply a piece of contact paper to the back of your plate (to protect that side) and trim carefully down to plate size with a sharp xacto (or similar) blade.
Once your plate is ready, you can sketch out the image you’d like to make with tracing paper and simple shapes. Trace your drawing with soft pencil either print off onto the ground surface with the press, or use handmade (or purchased) carbon paper and lightly trace it on. (Most of us preferred the carbon paper method over the press method.)
When considering your imagery and how you’re going to work your plate, keep in mind that copper etches down, not out. That is to say a long etch will deepen your line, not widen it. This means what you draw through the ground is what you get in your print. Various needle tools achieve different line widths. The needle pictured produces a fairly fine line (a diamond tipped etching tool will make an even thinner one!)
Gently press through the ground (try not to bite into the copper too much). When you’re satisfied with your drawing, you’re ready to etch!
![]()
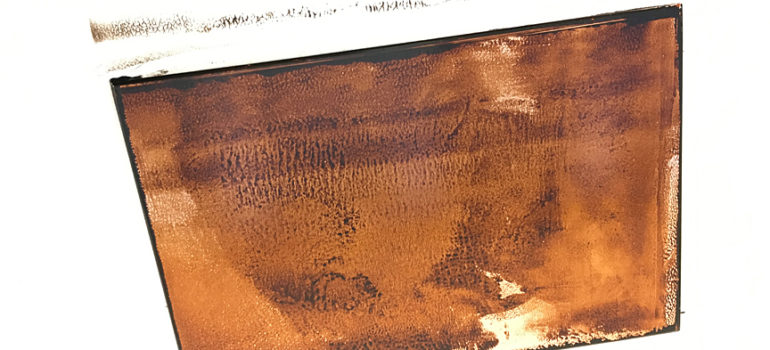
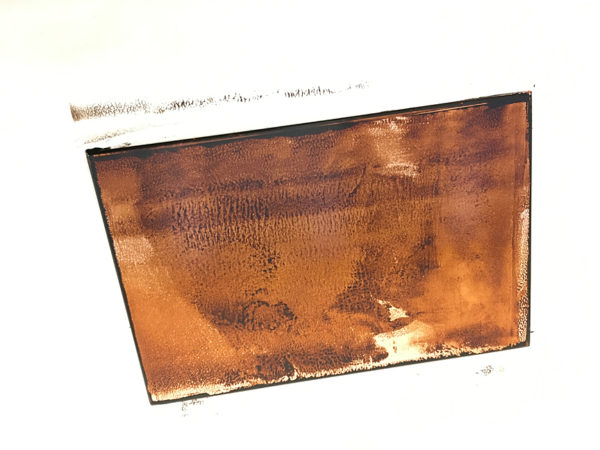
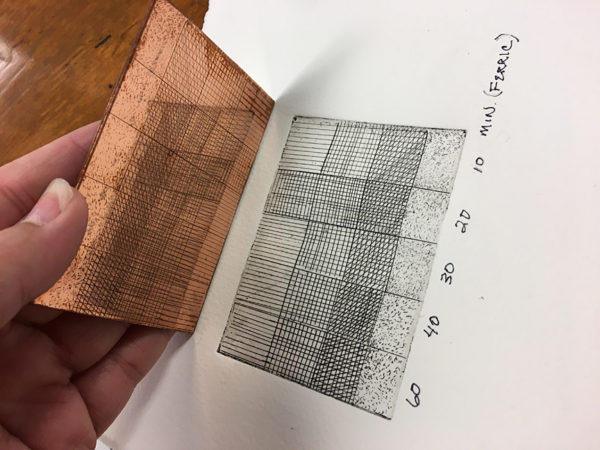
We etch our plates for 45 minutes in ferric. Below is a test plate of various etch times showing line, cross-hatch, and stipple.
Interested in taking a class in Copper Etching?
You can register on our classes page. If the class fills, we’re happy to add you to our waiting list if you indicate interest with our contact form!
Introduction to Copper Etching
Join us to learn basic etching on copper process along with inking, wiping, and printing the plate. This traditional Intaglio print process will also include preparing paper, using the presses and creating a signed edition. Once you take this beginner level class you are eligible to join the Friday etcher’s group to continue working with Andrea Knarr to build on your knowledge of the intaglio process.
August 20 and 27: 1:00-4:00 Andrea Knarr, instructor
Limit: 6 students $120.00 non-members/ $105.00 ($20.00 supply fee included) 6 PDU contact hours
Related Links
Andrea Knarr’s website
Tiger Lily Press Class Offerings